1、异常处理
SpringBoot对于异常处理提供了五种处理方式。
1.1、自定义错误页面
SpringBoot 默认的处理异常的机制:SpringBoot默认的已经提供了一套处理异常的机制。一旦程序出现了异常SpringBoot会向/error 的 url 发送请求。在SpringBoot中提供了一个名为 BasicErrorController 来处理 /error 请求,然后跳转到默认显示异常的页面来展示异常信息。
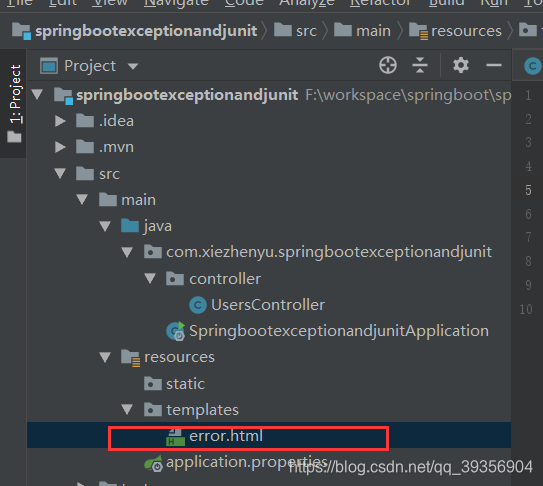
如果我们需要将所有的异常同一跳转到自定义的错误页面,需要再src/main/resources/templates 目录下创建 error.html 页面。注意:页面名称必须叫 error。
1.2、通过@ExceptionHandler注解处理异常
当controller中出现空指针异常的时候,都会执行下面这个函数。
1
2
3
4
5
6
7
| @ExceptionHandler(value = {java.lang.NullPointerException.class})
public ModelAndView nullpointExcetionHandler(Exception e){
ModelAndView mv = new ModelAndView();
mv.addObject("err",e.toString());
mv.setViewName("error1");
return mv;
}
|
弊端:处理异常的方法必须要和出现异常的方法在同一个Controller上面,达不到代码的复用。
1.3、通过@ControllerAdvice与@ExceptionHandler注解处理异常,实现全局异常处理
只要Controller中出现异常,都会找标有@ControllerAdvice注释的类去找对应的处理方法。
1
2
3
4
5
6
7
8
9
10
11
12
13
14
15
16
17
18
19
20
|
@ControllerAdvice
public class GlobalException {
@ExceptionHandler(value = {java.lang.NullPointerException.class})
public ModelAndView nullpointExcetionHandler(Exception e){
ModelAndView mv = new ModelAndView();
mv.addObject("err",e.toString());
mv.setViewName("error1");
return mv;
}
@ExceptionHandler(value = {java.lang.ArithmeticException.class})
public ModelAndView arithmeticException(Exception e){
ModelAndView mv = new ModelAndView();
mv.addObject("err",e.toString());
mv.setViewName("error2");
return mv;
}
}
|
弊端:在全局异常处理类中的方法会特别多。
1.4、通过SimpleMappingExceptionResolver对象处理异常
做异常和视图的映射实现异常的处理。
1
2
3
4
5
6
7
8
9
10
11
12
13
14
15
16
17
18
19
20
| @Configuration
public class GlobalException2 {
@Bean
public SimpleMappingExceptionResolver getSimpleMappingExceptionResolver(){
SimpleMappingExceptionResolver resolver = new SimpleMappingExceptionResolver();
Properties properties = new Properties();
properties.put("java.lang.NullPointerException","error");
properties.put("java.lang.ArithmeticException","error2");
resolver.setExceptionMappings(properties);
return resolver;
}
}
|
弊端:只能做视图和异常的映射,不能传递异常信息。
1.5、通过自定义HandlerExceptionResolver对象处理异常
通过实现HandlerExceptionResolver接口的方式进行异常处理。
1
2
3
4
5
6
7
8
9
10
11
12
13
14
15
16
17
18
19
20
21
22
23
24
25
26
27
28
|
@Configuration
public class GlobalException3 implements HandlerExceptionResolver {
@Override
public ModelAndView resolveException(HttpServletRequest httpServletRequest, HttpServletResponse httpServletResponse, Object o, Exception e) {
ModelAndView mv = new ModelAndView();
if(e instanceof NullPointerException){
mv.setViewName("error");
}
if(e instanceof ArithmeticException){
mv.setViewName("error2");
}
mv.addObject("error",e.toString());
return mv;
}
}
|
2、Spring Boot 整合 Junit 单元测试
&esmp;Spring Boot2.x 使用 Junit5 作为测试平台
2.1、修改POM文件添加测试启动器
1
2
3
4
5
6
7
8
9
10
11
12
| <dependency>
<groupId>org.springframework.boot</groupId>
<artifactId>spring-boot-starter-test</artifactId>
<scope>test</scope>
<exclusions>
<exclusion>
<groupId>org.junit.vintage</groupId>
<artifactId>junit-vintage-engine</artifactId>
</exclusion>
</exclusions>
</dependency>
|
2.2、编写测试代码
1
2
3
4
5
6
7
8
9
10
11
12
13
14
|
@SpringBootTest
public class UsersTest {
@Autowired
private UsersService usersService;
@Test
void suibian(){
this.usersService.addUser();
}
}
|